The install of a Vatrer 460Ah LifePo4
Vatrer 460Ah LiFePO₄ Battery Upgrade – Overview
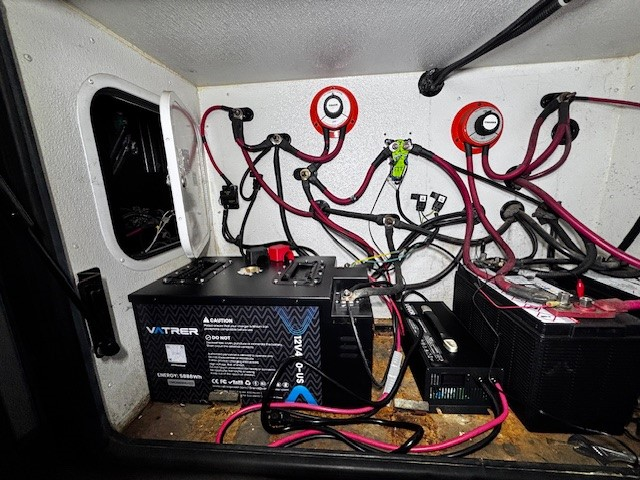
I installed a Vatrer 460Ah LiFePO₄ battery in my Class A diesel motorhome to replace the original lead-acid house batteries that came with the coach. Those batteries were aging, and usable capacity was limited.
After watching AZ Expert’s video on lithium upgrades, I decided to give this a try. The goal was simple: increase usable battery capacity and reduce recharge time without completely redesigning the electrical system.
This write-up documents what I did, how it worked out, and what I learned along the way. This is not a universal guide—every coach is different—so consider this a real-world example.
Your mileage may vary.
The 3 main components for this
Vatrer battery 460Ah no heated version should have gone heated but i ordered and then realized it comes truck freight. Weights close to 100 pounds Ordered off Amazon
Lithium Battery Isolation Manager. Model Li-BIM225 Use this in place of the big boy relay. Your could use a DC to DC charger but the simplcity of this and it works.
Optional but i ordered of Amazon a 12V 80A Lithium Battery Charger, 14.6V, AC-DC LiFePO4 Smart Charger. I use this if its cloudy and solar can’t keep up and I am not on shore power I just plug this into the generator powered outlet and the Vatrere battery charges very quick.
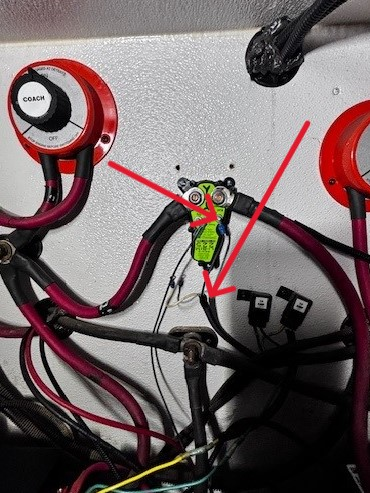
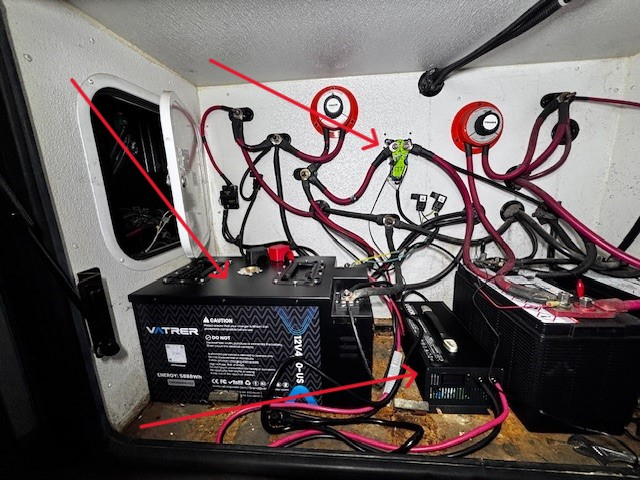
Battery Upgrade – BIM 225 Relay Install (House / Chassis Integration)
I replaced the original Big Boy relay and Intellitec B.I.R.D. relay with a BIM 225, since the BIM handles both functions in a single unit. Its primary role is to manage the connection between the house batteries and the chassis batteries while protecting the coach’s engine alternator.
Lithium (LiFePO₄) batteries can demand very high amperage and voltage when charging. The BIM 225 was designed specifically for this scenario. It monitors alternator output and prevents overloading or damaging it during high-current charge conditions.
Ignition Signal (Key-On Power)
The BIM 225 requires a 12-volt key-on signal to operate correctly. Rather than running a new wire from the ignition, I used the existing battery boost (often called the salesman switch) wiring.
At the battery boost switch by the driver’s seat:
- The purple wire was tied into the back of the ignition switch and connected to the BIM’s switched power terminal
- The white wire is unused and left as a spare
This provides the BIM with the ignition signal it needs to trigger correctly.
⚠️ Critical Warning – Read Before Doing This
You cannot use LiFePO₄ house batteries to boost or jump the chassis batteries.
There is not enough instantaneous amp load available, and attempting to do this will cause the Vatree battery management system (BMS) to shut down.
If the chassis batteries are low and need a jump:
- I use a 2500-amp NOCO jump box
This is a tradeoff I’m comfortable with given the benefits of the lithium system, including:
- increased usable capacity
- deeper discharge capability
- improved overall performance
When parked, I also shut off the chassis batteries, which further reduces potential issues.
⚠️ One More Time (Because It Matters)
Do not use LiFePO₄ batteries to boost chassis batteries.
Doing so will shut down the Vatree BMS.
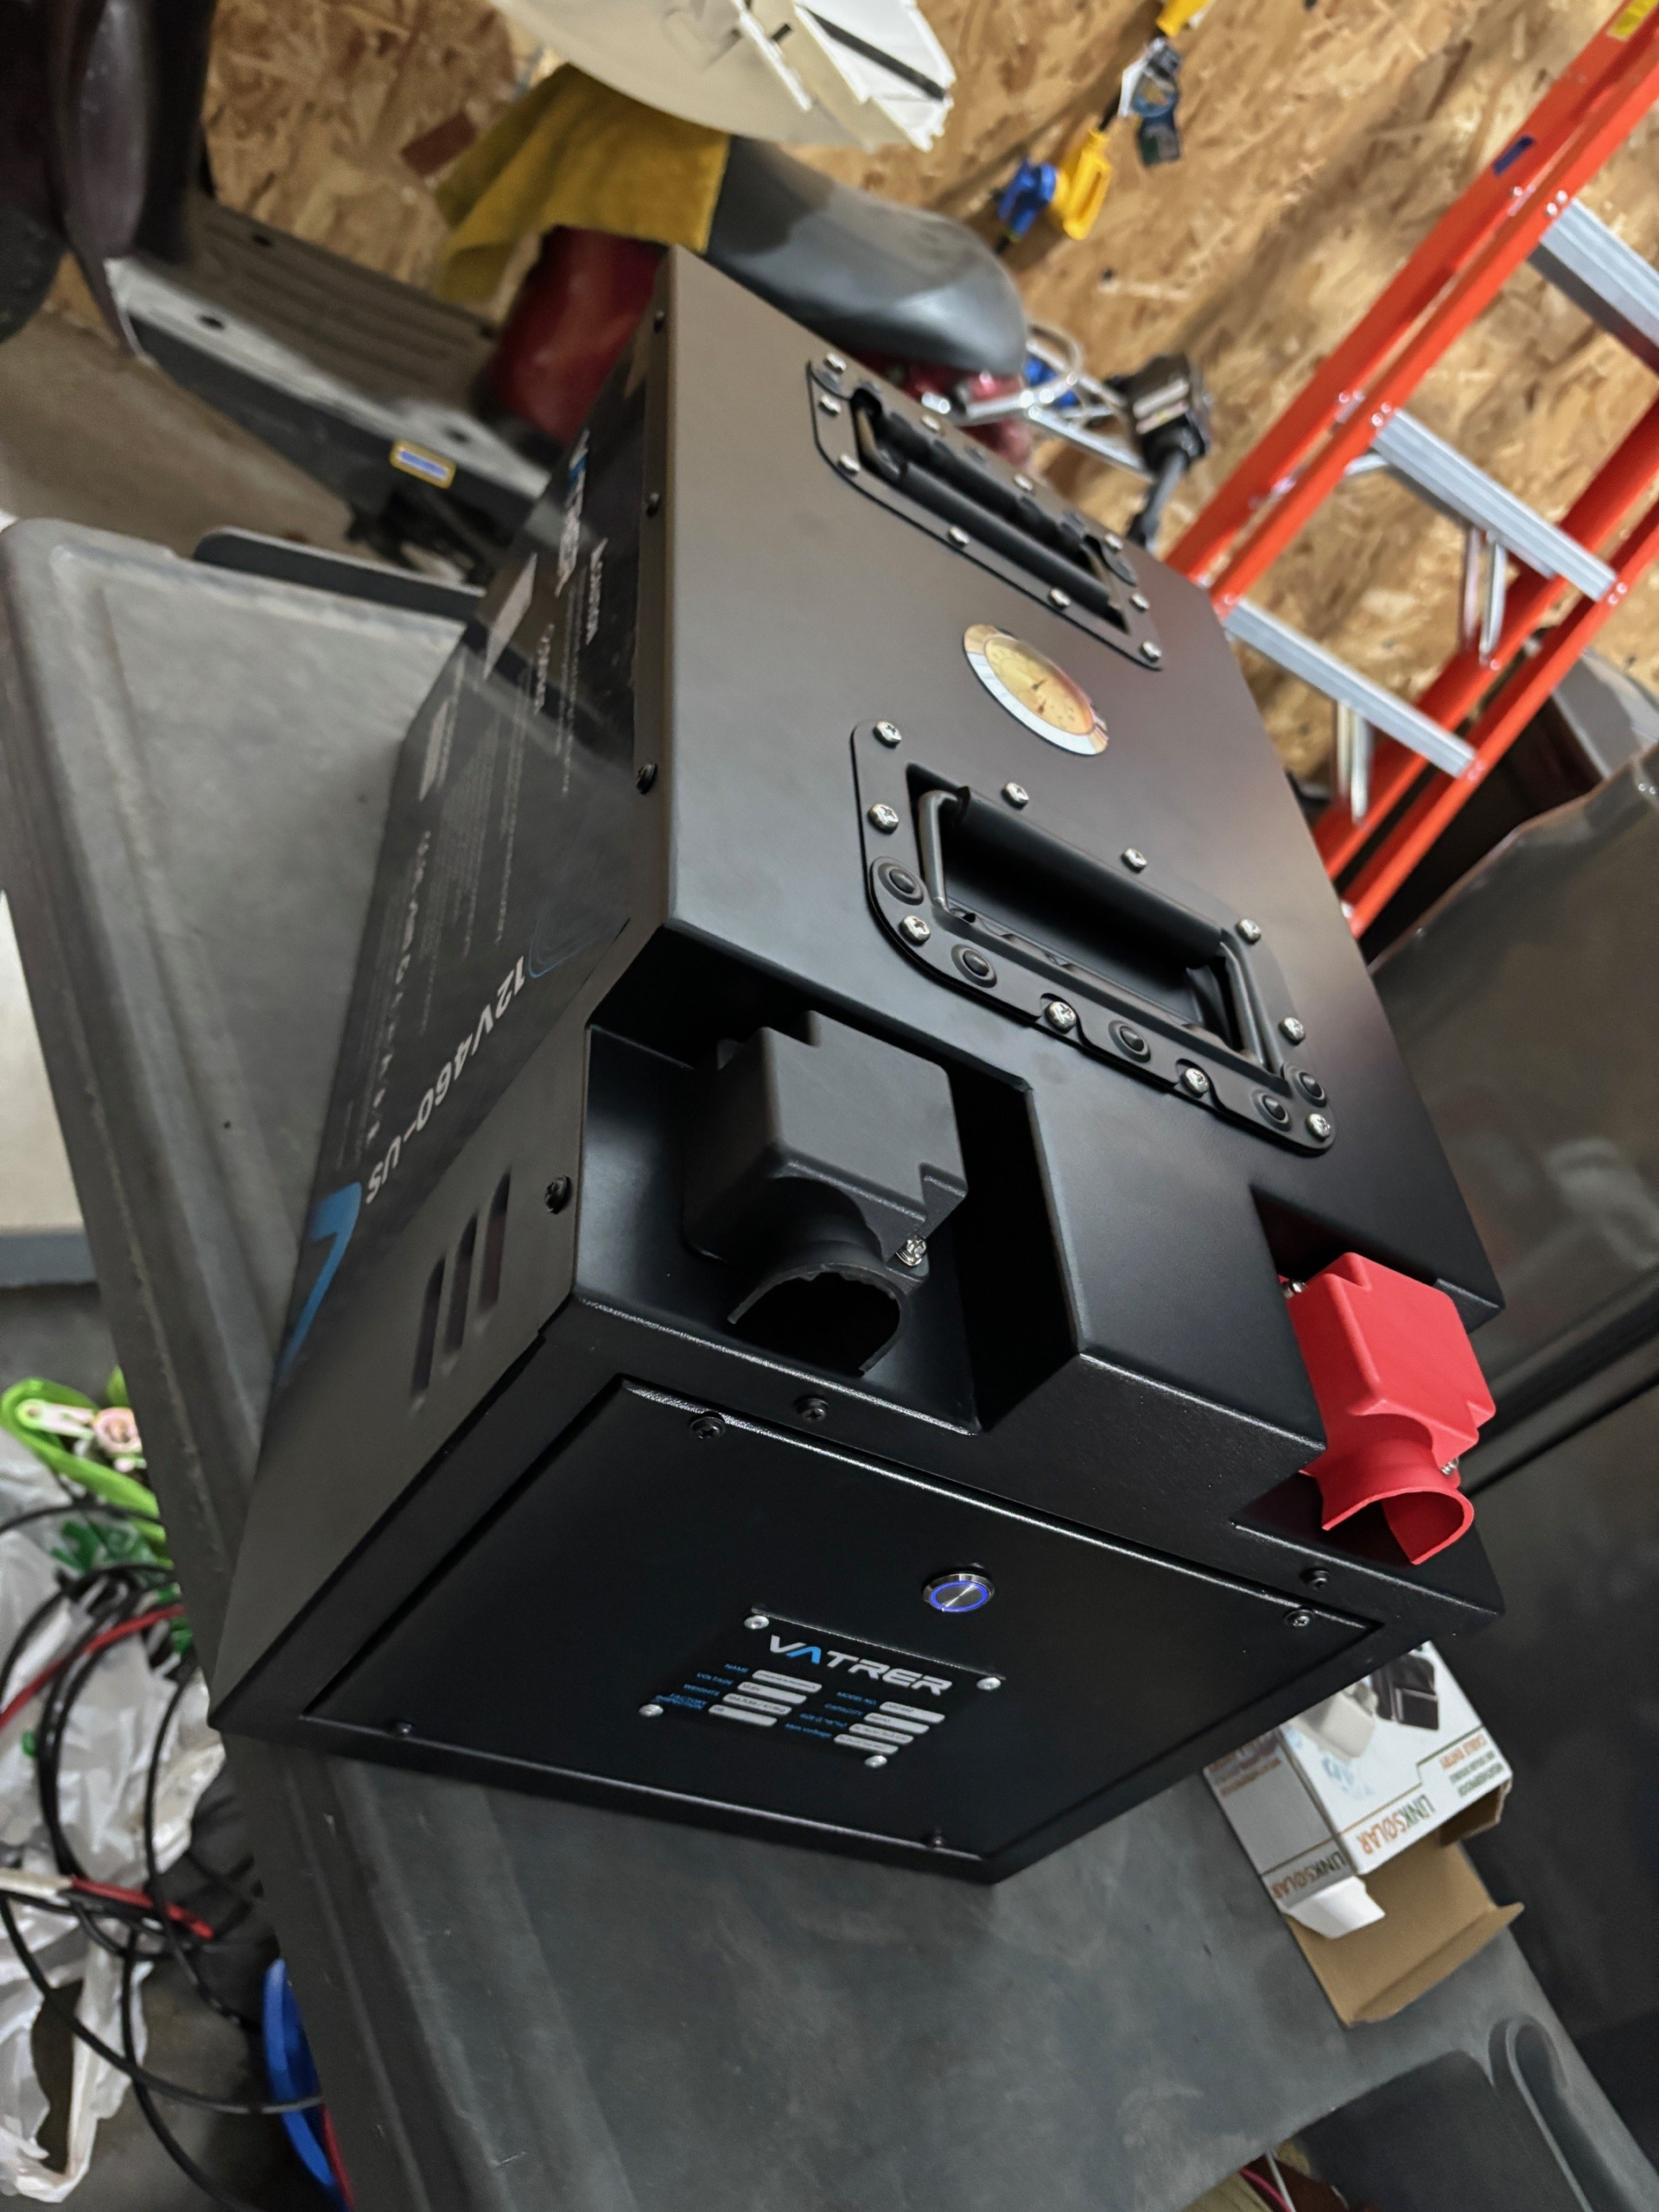
The Battery Vatrer's 460Ah12v LifePO4
Charging Limitations with Older Inverters (And How I Worked Around It)
This battery charges between 14.2 and 14.6 volts. Older inverter/chargers—like my Xantrex Freedom 458—only charge at around 13.7 volts. Because of that, you’ll only be able to charge a Vatrer LiFePO₄ battery to about 80–85% using older equipment.
The reason is simple: older inverters do not have a lithium charge profile. Some units can be updated with software, but mine could not.
To handle that remaining 15–20% charge, I use one of three methods depending on the situation:
- Solar to top off the battery when parked
- Coach alternator while driving, which will fully charge the battery
- Generator + charger: I run the generator for about 20 minutes using a Vevor 80-amp smart charger (about $150), which brings the battery to 100%
I chose this approach intentionally. A new inverter with lithium support can easily cost $1,000 or more, and for the small amount of extra effort required, this solution made more sense to me.
Your inverter or charger may already support lithium profiles or accept firmware updates—mine simply didn’t.
Real-World Battery Performance
All I can say is: I’m impressed. I love it.
I tested the system overnight in the shop and ran:
- the new residential refrigerator through the inverter
- TV and DVD
- LED lights throughout the coach
- electric fireplace
- computer charging
- Starlink
After 14 hours, the battery was still at 81%.
I then plugged in the Vevor charger, and the Vatree battery went from 81% to 100% in about 25 minutes.
Another feature I really like is the built-in ON/OFF switch. When you’re working on the system, you can shut the battery off completely—the lugs are dead, no arcing, no worries.
This has been the best upgrade I’ve done. I do wish I had gone with a heated battery version, but in my compartment setup this one will be just fine.
No more acid checks.
Deeper usable discharge.
Faster recovery charging.
I’m sold.
Battery Features (Real-World Useful Stuff)
Bluetooth App Monitoring
Real-time voltage, temperature, and state of charge through a mobile app
- Cold Temperature Protection
- Charging stops below 32°F and resumes above 41°F
- Discharging stops below -4°F
- Power & Longevity
- 3,840W load capacity
- 5,000+ cycles at 100% depth of discharge
- Built with 8 LiFePO₄ cells for long-term RV use
- Physical Size
18.9 × 10.82 × 9.84 inches
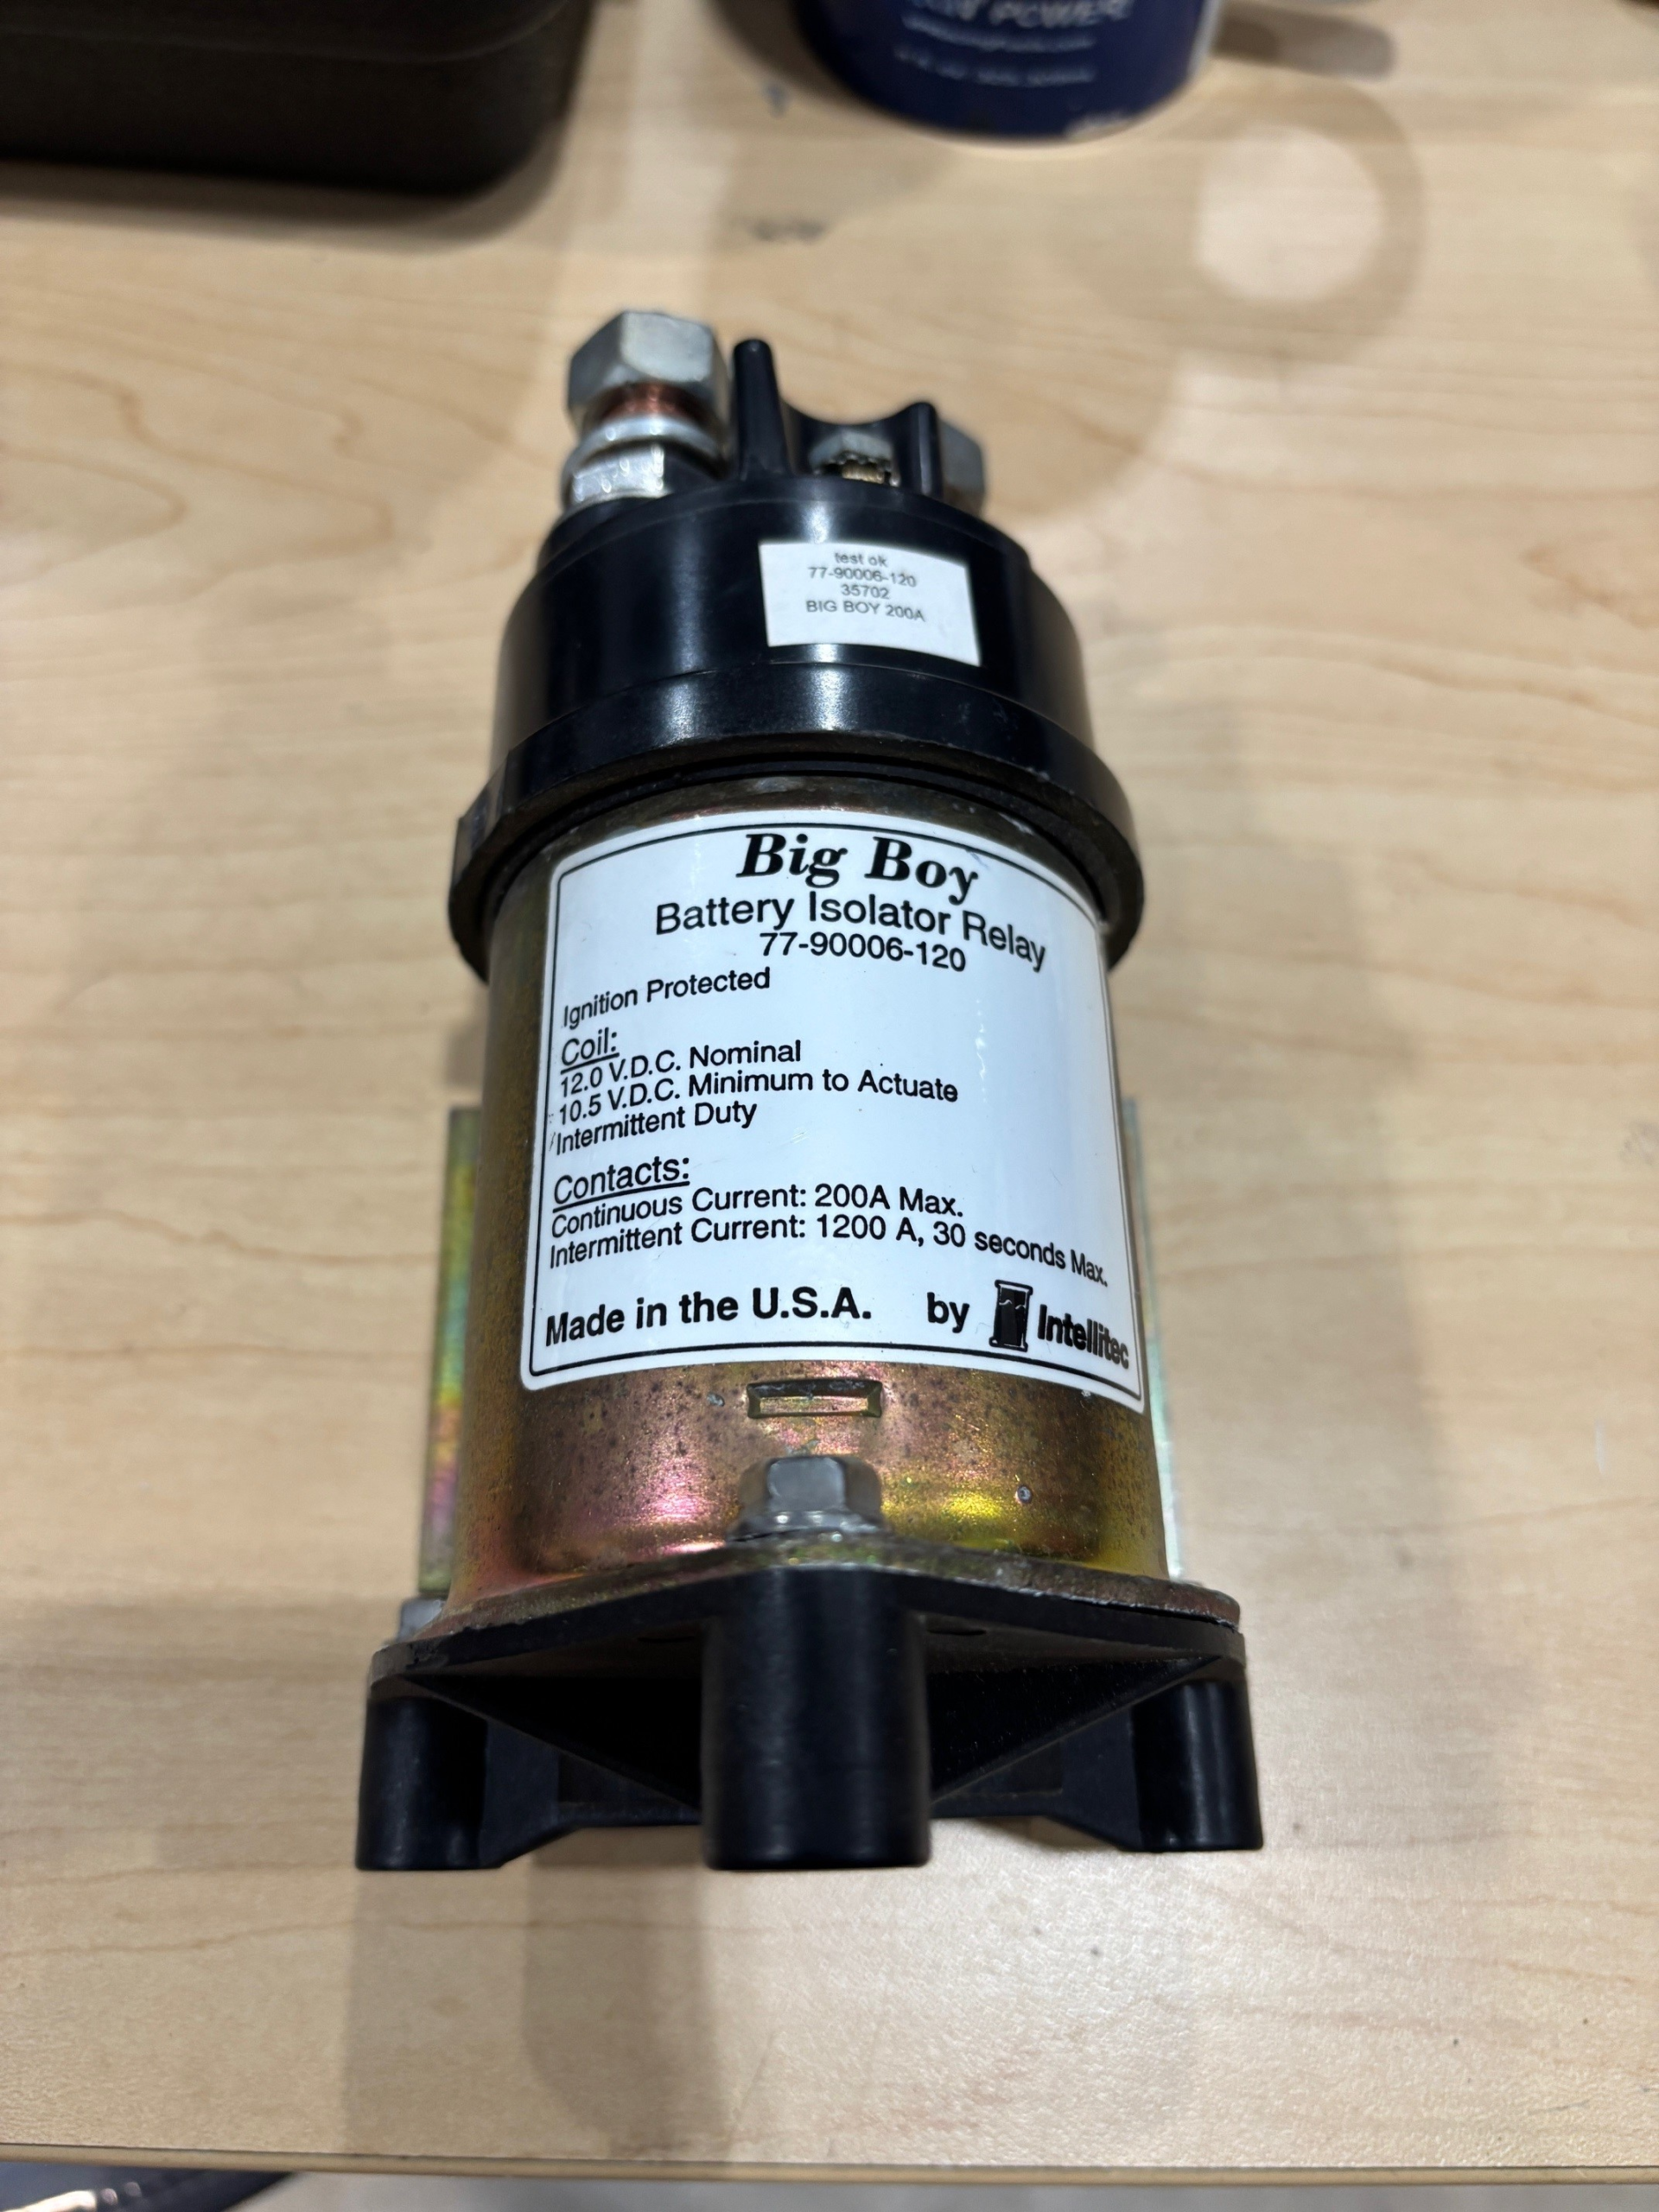
Big Boy Relay
The Battle Born Li-225 BIM replaces this unit and the B.I.R.D unit.
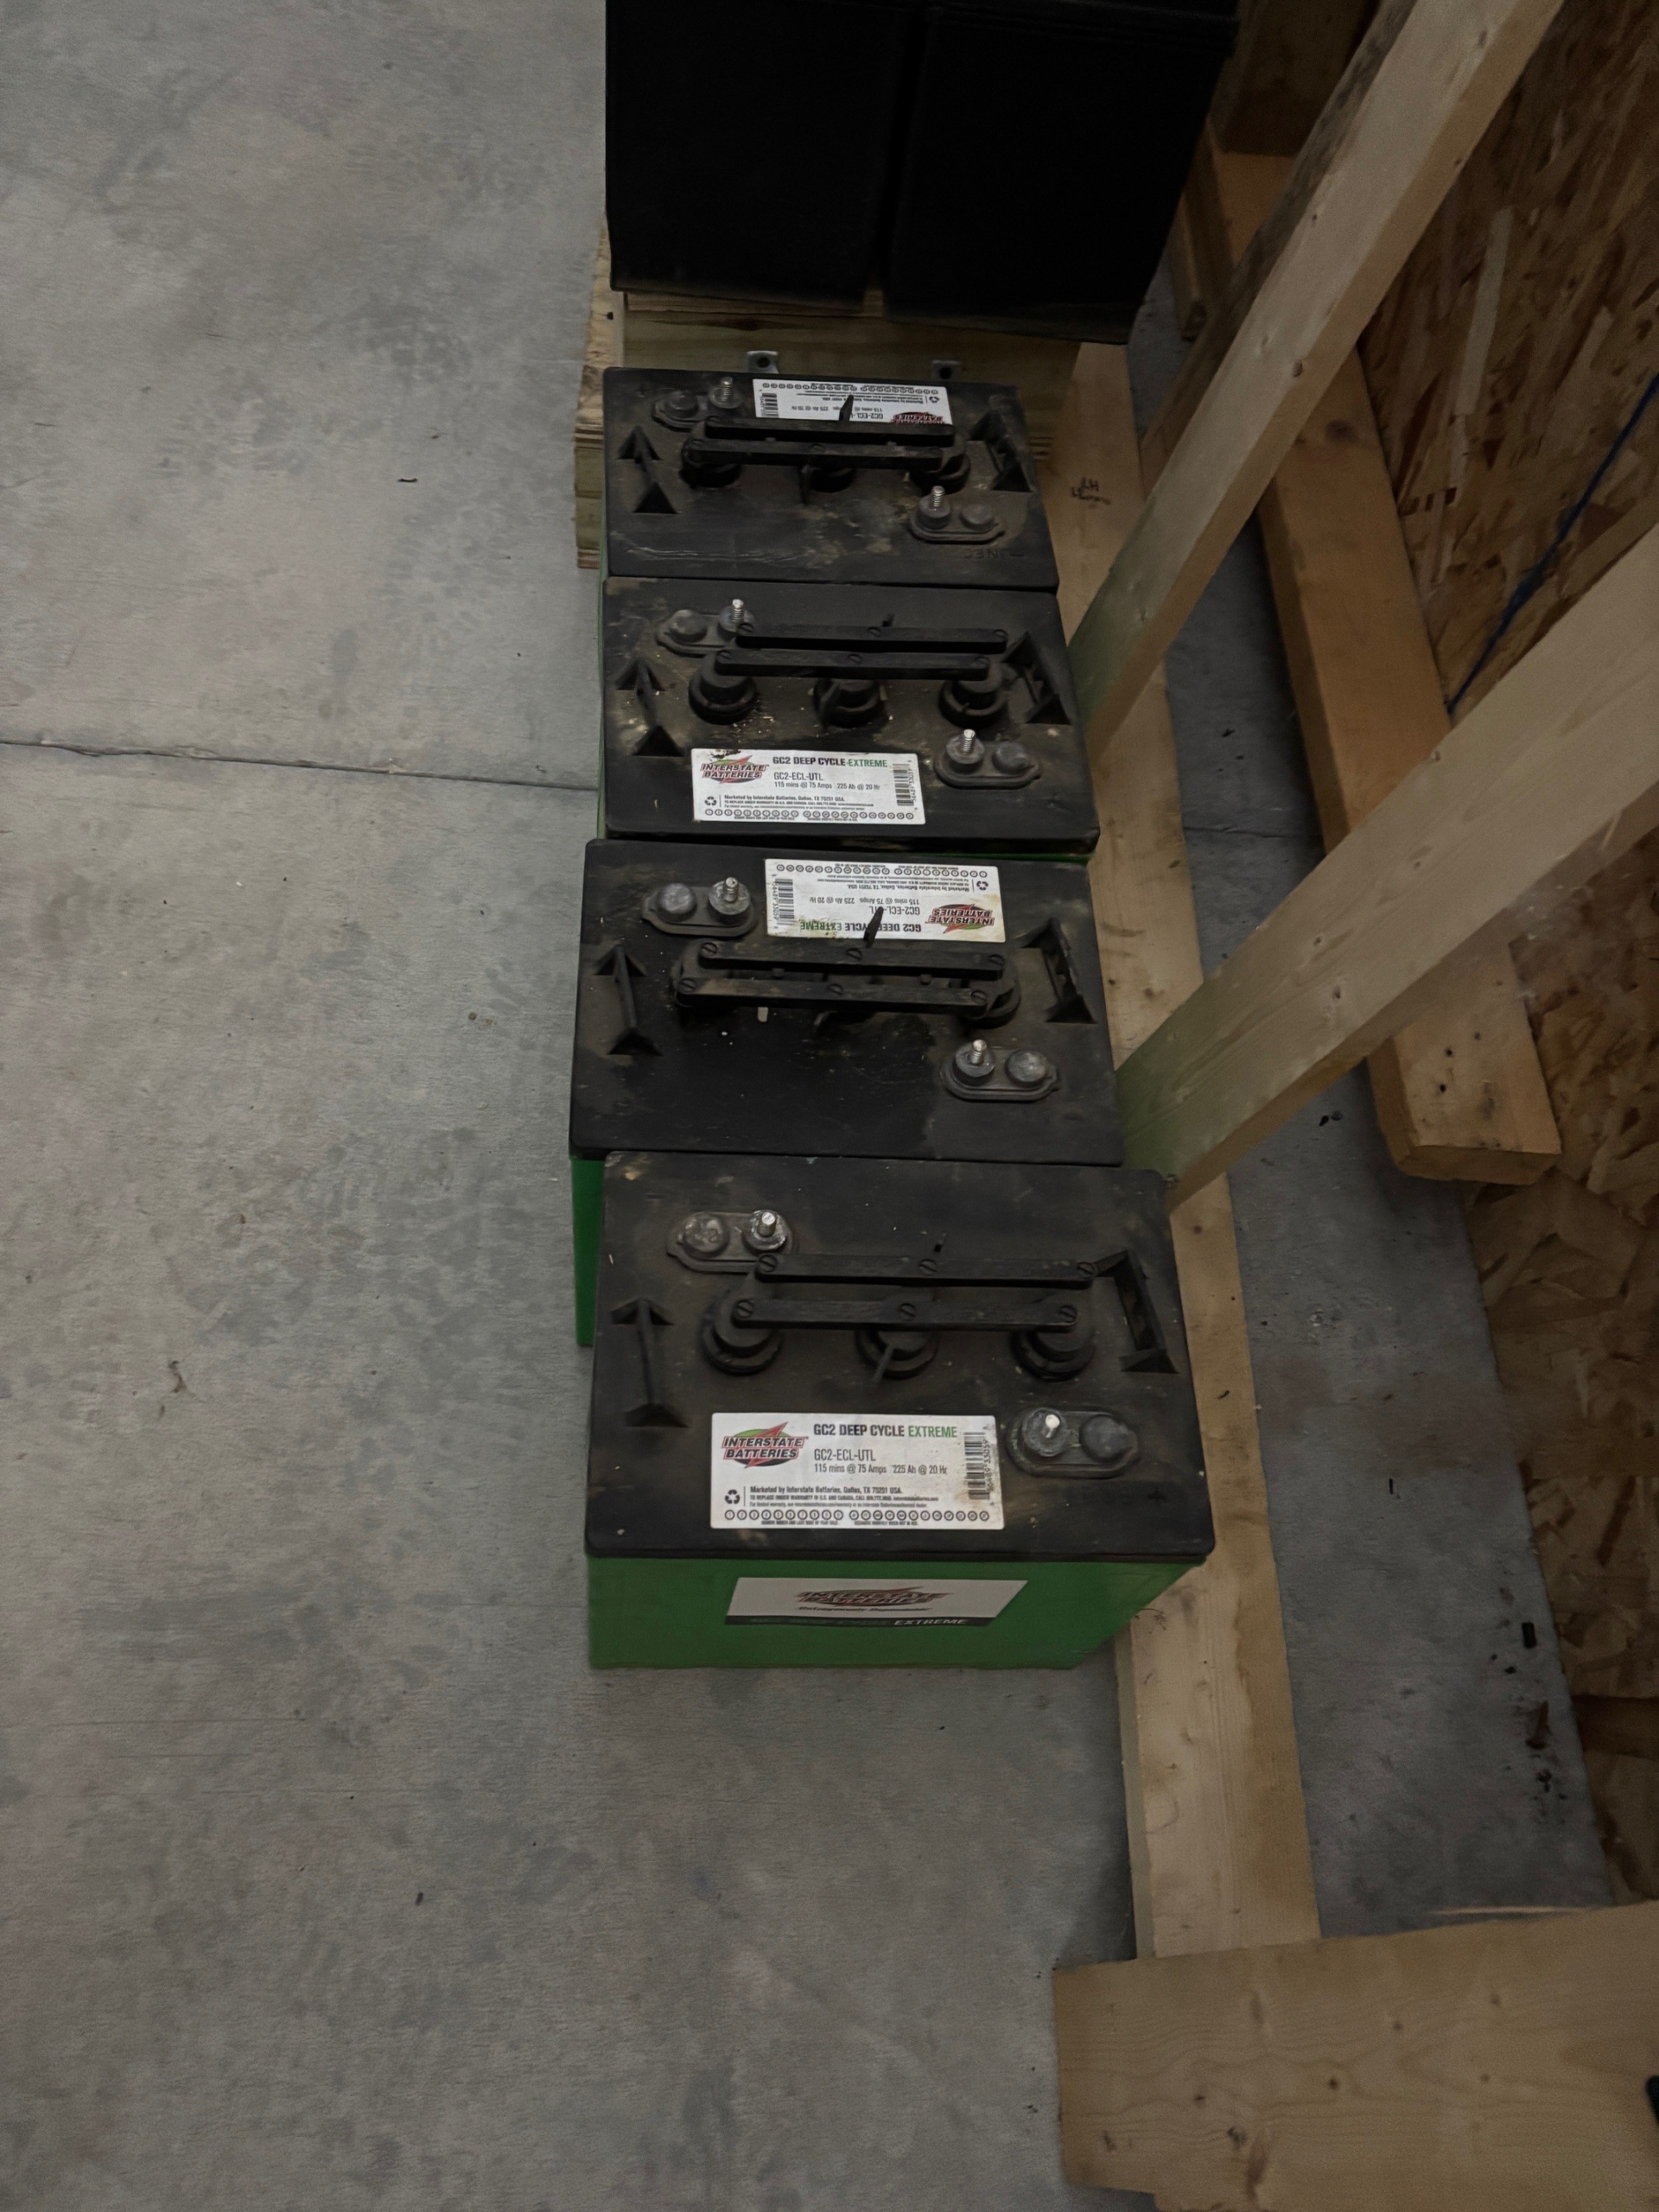
The old 4 Intestate batteries
I replaced these 4 with one steel case Lifepo4 no more acid checks and now i can see the statis of the battery everything you want to know via Bluetooth app.
Cost Break Dowm
- Vatrer 460Ah lifepo4 Battery cost $1074 with tax on Amazon
- Li-BIM 225 $137.20 on Amazon
- Didn’t have to buy anything else as all the cables fit.
- Total cost $1211.20
- Now I sold the Big Boy relay on eBay for $190.00
- Sold the batteries on Facebook Market place as they were still good for $250 as they were still good dates were only 3 yrs old and all tested good.
- 1211.20 minus 440 for the sale of used stuff the install cost $771.20.. That is less the 4 new battery’s and you have more amp hours and no acid to test and deal with. Over all i think this was a great install and love the outcome. For off grid/boondocking this is the way to go I believe.